


Contouring and highlighting can completely transform your face when it comes to makeup. These techniques help define your features, giving your face a sculpted and radiant look. Whether you want sharp cheekbones, a slimmer nose, or a glowing complexion, the right contour palette and face highlighter can make all the difference. The best part? You don’t need to be a professional makeup artist to master it! With the right contouring palette and professional highlighter palette, you can enhance your natural beauty in just a few steps.
This blog will guide you through sculpting and defining your face using simple techniques and the best contour powder and highlighter palette options. Whether you are a beginner or looking to refine your skills, this guide will effortlessly help you achieve a flawless, well-defined look.

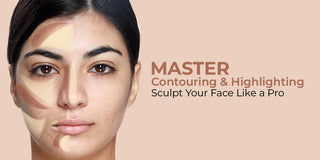
How to Sculpt and Define Your Face with Contouring and Highlighting
Step 1: Prepping Your Skin
A well-prepped face is the key to smooth and long-lasting makeup. Start by cleansing the skin to remove any oil or dirt. Follow up with a good moisturizer to keep the skin hydrated and prevent makeup from looking dry or patchy.
Once the skin is moisturized, apply a primer to create a smooth base. This helps makeup last longer and prevents it from creasing. After priming, use a foundation that matches the skin tone to create an even base. A well-blended foundation ensures that contouring powder and face highlighter apply seamlessly.
Step 2: Choosing the Right Contour and Highlight Shades
The right contour palette and highlighter palette can make all the difference in achieving a natural, sculpted look.
-
Contour Shades: Choose one to two shades darker than the natural skin tone. Cool-toned contours create shadows, while warm tones give a softer, sun-kissed effect. Contouring powder is ideal for oily skin, while a cream contour palette blends well on dry skin for a more natural finish.
-
Highlight Shades: A highlighter should be one to two shades lighter than the skin tone. A matte or soft shimmer blush and highlighter palette works well for a natural glow. A more radiant look is desired, a professional highlighter palette with a stronger swimmer can be used.
Step 3: Mapping Out Contour and Highlight Areas
Knowing where to place contour and highlight is essential to define the face correctly.
-
Contouring Areas: Apply contouring powder along the hollows of the cheekbones to add depth. Sweep it along the jawline for a more structured look, and blend a small amount on the sides of the nose to create a slimmer appearance. The temples and forehead can also be contoured to balance the face shape.
-
Highlighting Areas: Apply a highlighter on the high points of the face, such as the tops of the cheekbones and the bridge of the nose. A touch of highlight on the brow bone and cupid’s bow enhances features and gives the face a lifted look.
Step 4: Blending for a Seamless Look
Blending is the most important step to ensure a natural finish. Harsh lines can make makeup look unnatural, so softening the edges is essential.
-
Blending Techniques: Use a damp sponge to blend cream contour smoothly into the skin. For powder contour, a fluffy brush helps diffuse the product evenly.
-
Best Tools: Depending on the product type, brushes, sponges, or fingers can be used. A makeup contour palette works best with a contour brush, while a highlighter and blush combo blends beautifully with a fan or fluffy brush.

Step 5: Setting Your Sculpted Look
Setting makeup ensures it lasts throughout the day. A translucent powder can lock everything in place, especially in oily areas. A setting spray adds a natural finish, preventing makeup from looking cakey.
For a flawless look, lightly dust the face with a setting powder and mist a setting spray over it. This helps keep contour, blush and highlighter intact for long-lasting wear.
Common Mistakes to Avoid When Sculpting Your Face
Contouring and highlighting can beautifully enhance facial features, but a few mistakes can make the makeup look unnatural. Avoiding these errors ensures a well-defined, polished look.
1.Choosing the Wrong Shade
Using the wrong shades for contour powder and face highlighter is one of the biggest mistakes.
-
A contour powder that is too dark can look muddy, while a shade too light won’t create enough definition. Choose a shade two tones darker than your skin tone for contouring.
-
A face highlighter for fair skin should have a champagne or pearl shade, while deeper skin tones look best with gold or bronze highlights.
2.Over-Blending or Leaving Harsh Lines
Blending is key, but over-blending can make the makeup disappear, while not blending enough leaves visible streaks.
-
Use a fluffy brush for contouring powder to create a soft, natural look.
-
A damp sponge works best for a cream contour to avoid patchiness.
-
Always blend in circular motions to avoid sharp, unnatural lines.
3.Applying Too Much Shimmer in the Wrong Places
Highlighter enhances the high points of the face, but too much shimmer can make the skin look greasy rather than glowing.
-
Avoid placing blush and highlighter on areas with large pores or fine lines, as shimmer can make them more visible.
-
For a natural glow, lightly apply highlighter and blush to the cheekbones, brow bone, and nose bridge.
Pro Tips for a Flawless, Long-Lasting Sculpted Look
Mastering contouring and highlighting techniques can create a naturally sculpted, bold, dramatic look. Here are some expert tips to ensure your makeup stays flawless all day.
H3: Subtle Sculpting for Daytime vs. Bold Definition for Glam Looks
-
For a natural daytime look: Use a light hand with a contour powder and blend well for a soft shadow effect. A highlighter with a subtle glow enhances features without looking too shimmery.
-
For a bold evening look: Choose a contour with deeper tones and a highlighter and blush combo with extra shimmer for a more defined, glamorous effect. Layering and building intensity create a striking appearance.
Tricks to Lift and Slim Facial Features Naturally
-
Apply contour powder slightly above the hollows of the cheeks to create a lifted effect.
-
Blend the powder along the jawline and temples to give the illusion of a more structured face.
-
Use the best highlighter on the cheekbones and brow bone to enhance natural light reflection and create a fresh, radiant look.
How to Make Contour Last All Day Without Looking Cakey
-
Start with a primer to create a smooth base before applying cream or powder contour.
-
Use a face highlighter with a fine texture to prevent excessive shine.
-
Set the makeup with a light dusting of translucent powder to lock it in place. A setting spray ensures the sculpted look stays fresh throughout the day.
Final Thoughts
Creating a well-defined look with contouring and highlighting starts with the right techniques and seamless blending. Every step plays a crucial role in enhancing facial features, from selecting the perfect contour powder to applying blush and highlighter. With practice and the right tools, anyone can master this art to create a naturally sculpted appearance. Confidence is the key—it shows when you feel good about your makeup!
For the best results, choosing high-quality products makes all the difference. Whether you’re looking to buy makeup products online or explore the latest trends in cosmetics, Character Cosmetics offers a wide range of professional products to help you perfect your sculpted look. With the right makeup, every face can be a masterpiece waiting to shine.
FAQs
1.Can I use a blusher highlighter for a natural look?
Ans: Yes! A blusher highlighter adds a subtle glow while providing a flush of color, making it perfect for a fresh, natural look. Choose a soft shimmer formula for the best effect.
2.Is it necessary to use both contour and highlighter together?
Ans: No, but using both effectively enhances facial features. Contour defines and adds depth, while highlighter brings out high points for a balanced sculpted look.
3.How do I choose the right contouring palette for my skin tone?
Ans: Pick a contouring palette with cool-toned shades for fair skin and warm or neutral shades for medium to deep skin tones. Choose cream formulas for dry skin and powders for oily skin.
4.What is the ideal highlighter palette price for beginners?
Ans: Highlighter palette prices vary depending on the brand and quality. Choosing one that fits your budget while ensuring smooth application and a natural glow is best.
5.Can I use a foundation stick instead of a contouring palette for contouring?
Ans: Yes, a foundation stick in a darker shade works well for contouring. Just ensure it blends seamlessly for a natural finish.
6.How can I prevent my contour from looking too harsh?
Ans: Blend thoroughly using a fluffy brush or sponge, starting with a light hand. Gradually build intensity to avoid streaks or harsh lines.
7.What is the best way to apply a face highlighter for a dewy effect?
Ans: Use a damp sponge or fingertips to dab a liquid or cream highlighter on the high points of your face for a soft, radiant glow.